by Dillon B. (additional writing by Ryan O.)
As long as a wall is not load bearing, you can tear it down for a remodel when you want a more open space for your room. Load bearing means that the structure is essential to keep the house intact and standing. Refer to the floor plans of your home to confirm if it is part of the framing that can be taken down.
Preparing to tear down that wall
This is what you will need for this home remodeling project:
-Hammer/Sledgehammer
-Reciprocating saw
-Tool with a chisel end or edge
-Socket wrench (to remove lag bolts)
-Crowbar
-Wire cutters
-Wire nuts
Step one: Disconnect Electrical
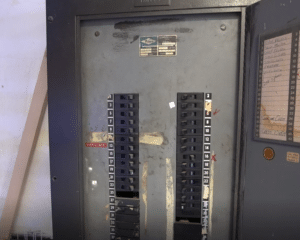
Shut off the power at your breaker box that goes into the room that you want to remodel. You can try different switches to see which one deactivates the power in that room.
Step two: Remove Outlets
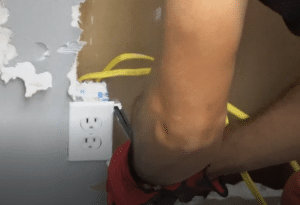
Break the drywall around the area of the outlet to gain access to the areas behind the wall. Follow the path of the electrical wiring of the outlet to its source by continuing to break down the drywall along that line. Stop at the point where the wiring is no longer part of the wall that you are taking down.
Cut the wires at the source with wire snips or cutters. For safety, put wire nuts on the exposed ends that are still connected to the electrical power of the house.
The snipped wire connecting from the outlet to the source can now be removed along with the outlet.
Step three: Remove Window
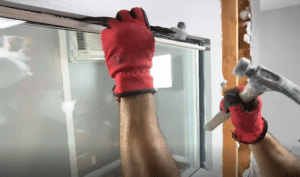
If you have windows, remove the trim that keeps the window in place with an edge that can be lodged into the trim and plied out. A hammer can be used to leverage more force on the handle end of that edge.
After the trim is removed, carefully pry the pane from its position in the wall.
Step four: Demolish Drywall
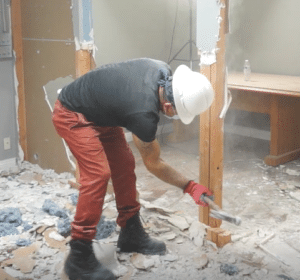
Once all the outlets and any windows have been removed, be aware of the placement of the studs and destroy the drywall with a sledgehammer or a tool that allows you to gain access to the wood frame of the wall. Remove enough of the drywall to expose the studs.
Step five: Remove studs
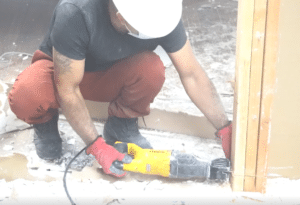
Remove the studs with either a hammer or a reciprocating saw. A hammer will knock out smaller studs, especially if they were part of the framework around windows.
A reciprocating saw will be useful in overall demolition with a blade that concentrates on a singular area. Extract each stud one at a time and cut the bottom of the stud along the bottom plank of the frame before cutting the top.
Repeat the process until all vertical studs have been removed.
With most of the studs out of the way, remove the remaining drywall.
Step six: Protect Drywall on Ceiling
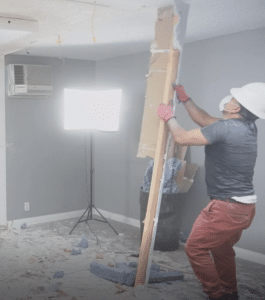
Now we will take out the two remaining parts of the frame, the top and the bottom pieces of the wall structure, also known as the top and bottom plates.
Carefully remove the nails or screws that fasten the top plate to the ceiling with a screwdriver or a reciprocating saw. Be careful to avoid doing damage to the drywall on the ceiling when possible.
Step seven: Protect Floor from Excessive Damage
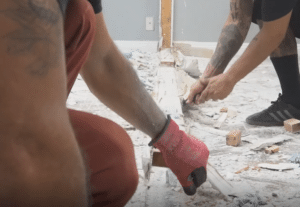
Using a wrench, loosen or remove the lag bolts that secure the bottom plate. Lag bolts are meant to secure the plate to the floor so they will need more force than usual to remove, so loosening is more likely than removing. Pry the bottom plate with a crowbar, extract it and steer clear of doing excess damage to the floor if you can.
Step Eight: Clean Up
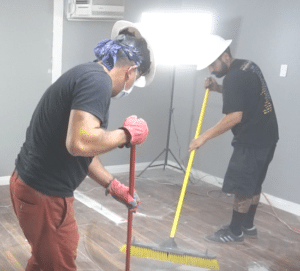
Part of completing a project or job site is making sure the debris has been removed to complete the home improvement process. With the wall removed, you can begin to paint your ceiling or work on your floor to achieve the spacious room you’ve always wanted!
For more remodeling tips from Dillion in his Home Remodeling series, check out our other DIY videos on Best Online Cabinets!


