by Dillon B. (Additional writing by Ryan O.)
When installing or replacing a new door in your house, one of the easiest ways to do this is to use a pre-hung door. A Pre-hung door is a door that already comes in its own frame, ensuring that the door will easily swing and work as needed, which is the most important function of the door. However, to install this with a perfect fit, follow these instructions to put that new door into place!
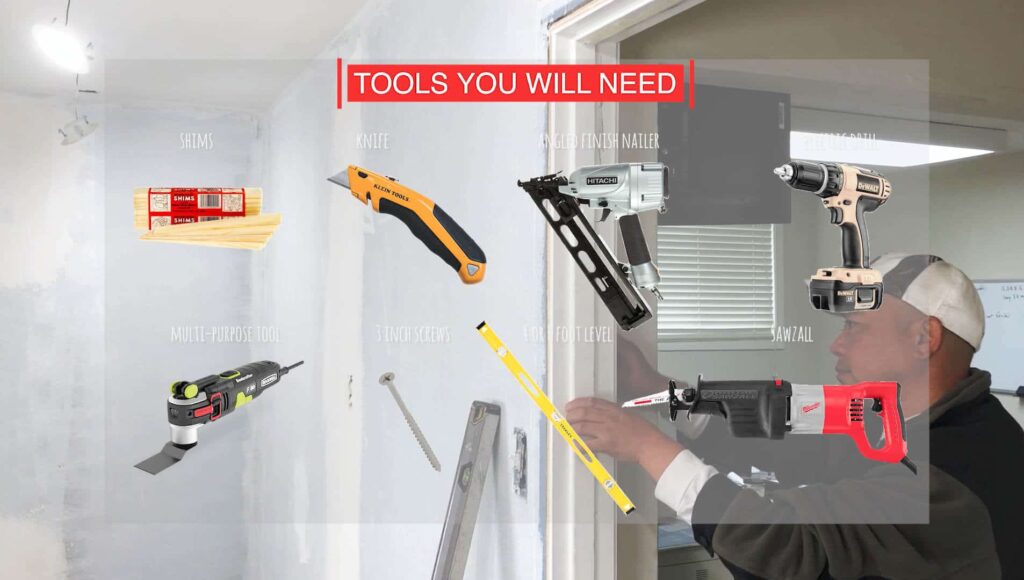
Here are the tools you will need for this project:
- Shims
- Knife
- Angled Finish Nailer (Brad Nailer)
- Electric Drill
- Multi-Purpose Tool
- 3-inch Screws
- 4-to-6 foot Level
- Reciprocating Saw (Sawzall)
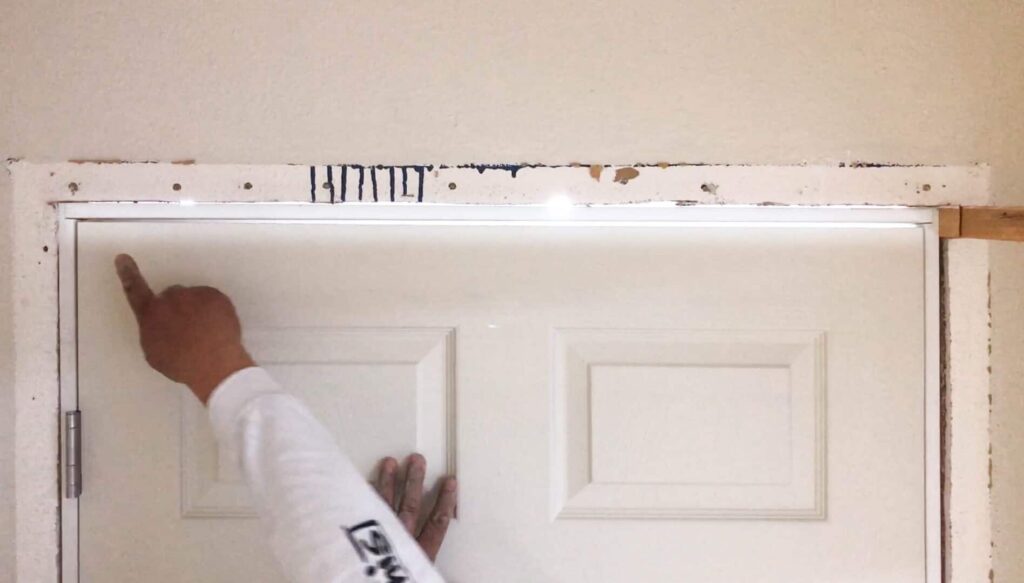
Step 1: Remove the door trim and the door itself
Score along the side of the door trim (what we commonly think of as the paneling the frames the door) with a blade to loosen it and remove it. Do this on both sides so that you get access to the door jamb behind it.
Remove the door and the hinges by taking out the screws.
Step 2: Remove the door jamb
Extract the door jamb, the part of the door frame that interacts directly with the door. The fastest most recommended way to do this is to use a reciprocating saw or a Sawzall to cut the jamb in half and remove the pieces.
Remove any screws that attach the jamb to the structure of the house. You will usually find them close to the door hinge area or near the strike plate, which is the plate that interacts with the bolt of the doorknob.
Step 3. Remove the threshold (if the door has a threshold)
Some doors have a metal plate underneath the door called the threshold that people walk over. You will want to remove that during this process.
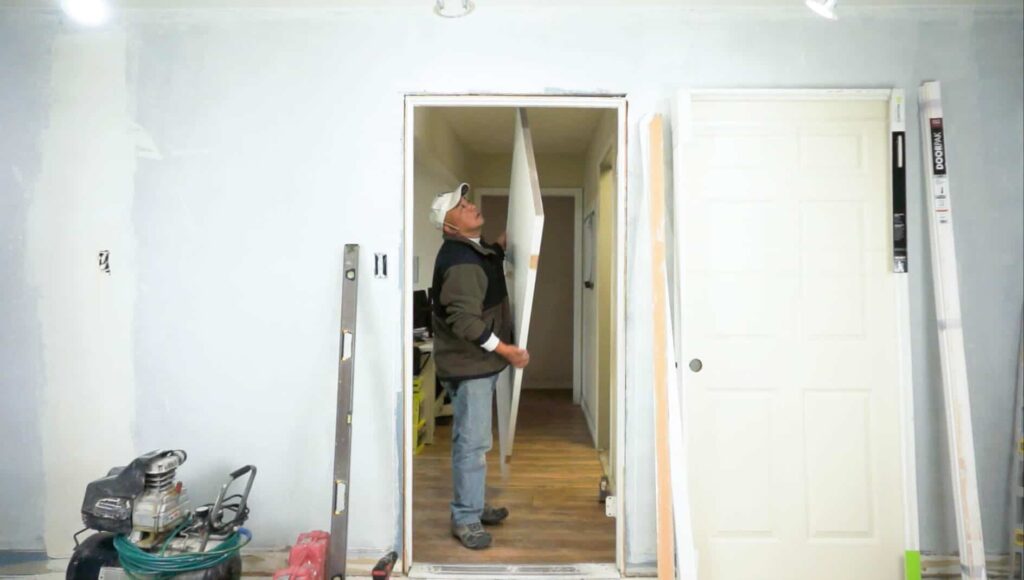
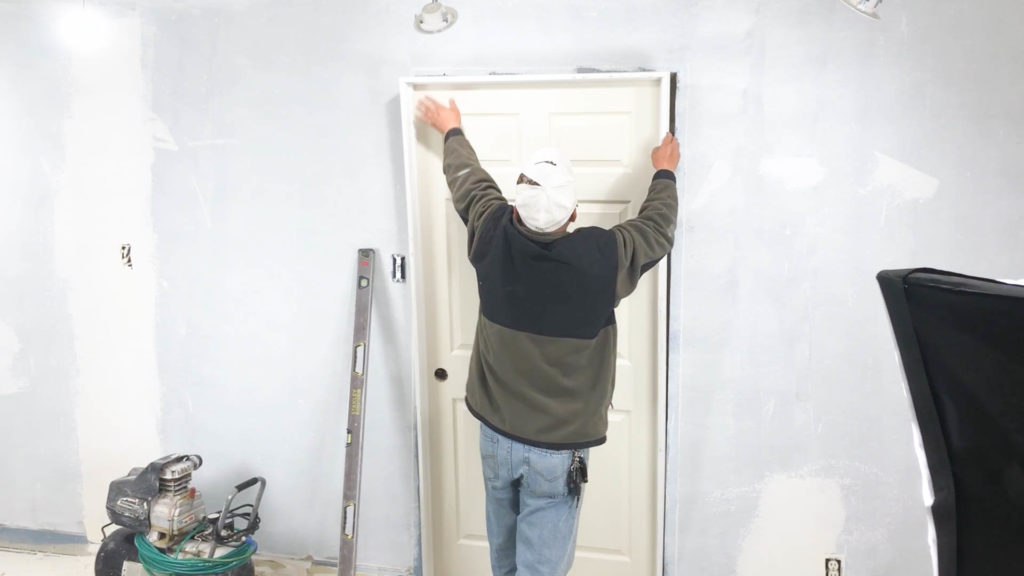
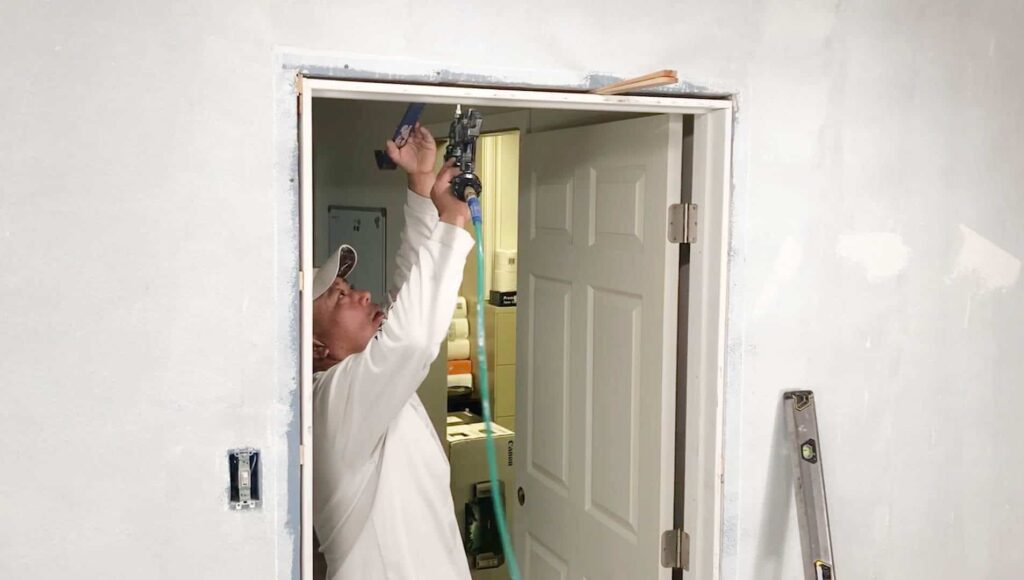
Step 4: Prep the Pre-Hung Door

Remove the cardboard packaging on the prehung door. Then dry-fit the door, which means to just fit the pre-hung door in the door opening to make sure it will work. If any of the sides of the frame are too long, you will need to adjust the frame by making cuts.
In our example, the door and frame are a ¼ inch too tall so the frame is hitting the door. So the frame was marked a ¼ inch off the end on both sides of the frame and we used a multipurpose tool (a skill saw is also recommended) to cut off the excess of the frame.
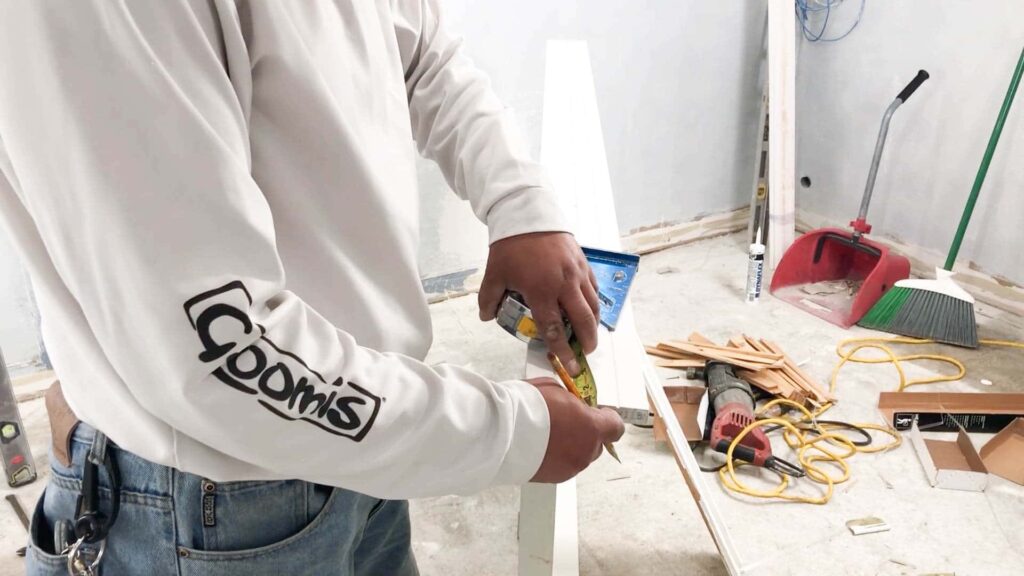
The multi-purpose tool can also be used to cut anything around the door frame so that it fits.
Insert shims at the bottom of the door frame if it needs a lift into the proper position in the door opening. In this case, a ¼ inch shim on both sides of the door frame was needed to prop the door to its proper place.
Step 5: Insert shims on the hinge side of the door to make the door frame plumb and level

Check to see how vertically straight (plumb) and how horizontally straight (level) the hinge side of the door opening is. By seeing how far off from vertically straight the hinge side of the door opening is, we will know how much the side of the door will need to be adjusted by shims, or small blocks of wood used to adjust the frame.

Using a four or six-foot level as a straightedge, set it against the jamb on the hinge side of the door and notice any gaps between the jamb and the straightedge. Wherever you see a gap, that is where you insert a shim between the jamb and the drywall to straighten the jamb and close the gap and make the door jamb square.
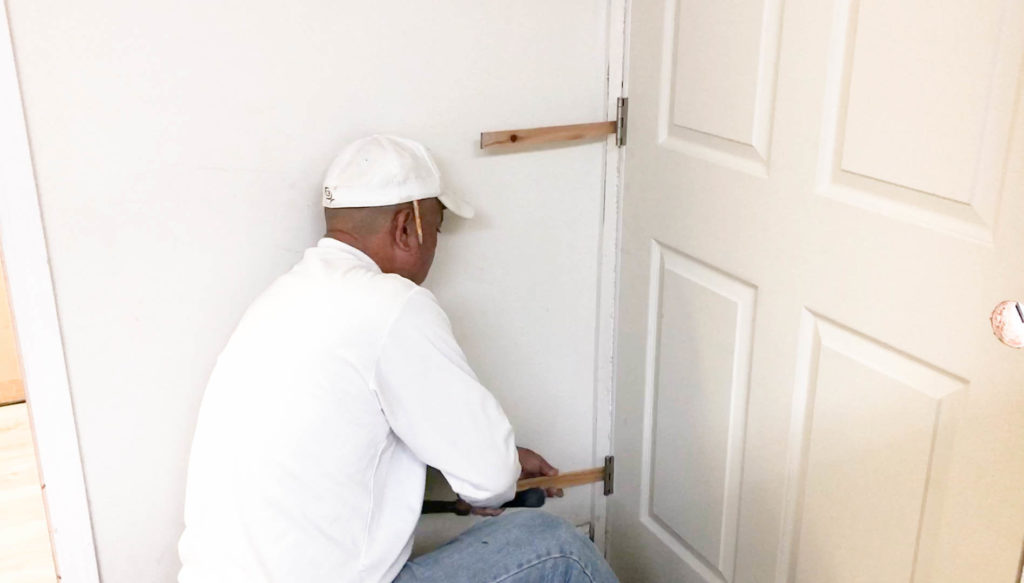
You will most likely insert those shims just below the hinges.
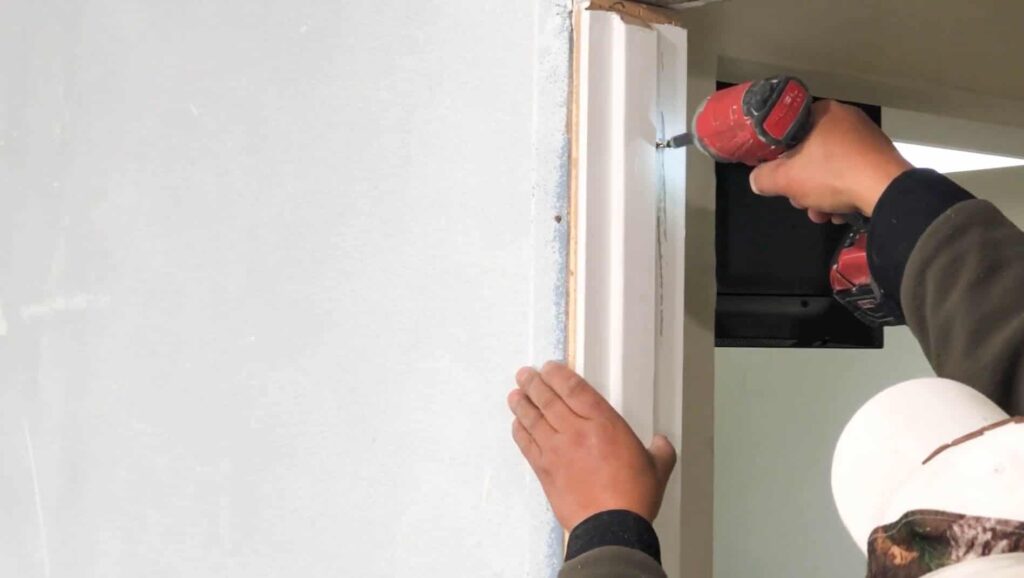
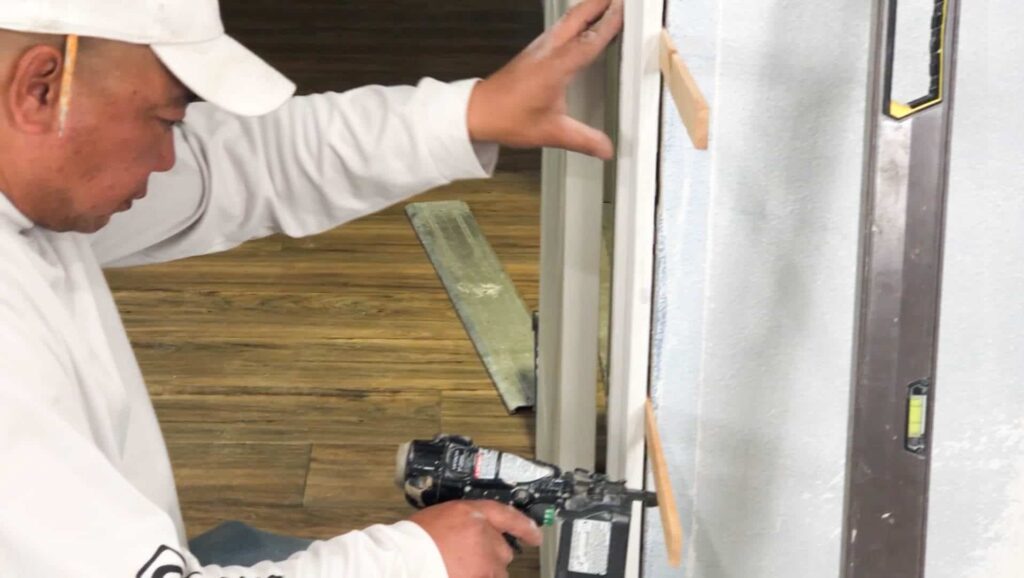
Step 6: Secure jamb and cut off shims
Once you get the jamb on the door hinge side plumb, secure each of the shims to the jamb with a couple of nails from an angled finish nailer (also called a brad nailer). Then cut off the excess shims off the side of the jamb.
Step 7: Start shimming the strike side of the door to make the reveal (the gap between the door and the frame) consistent
After making sure that the hinge side of the door is plumb and level, the next step is to check the reveal to make sure it is a consistent gap all the way around the door, including the strike side of the door (where the doorknob is) and the top of the door. If it is not consistent, double check to make sure the hinge side is plumb and level again before beginning to shim on the other side.
Then insert shims along the strike side of the door, making sure that the reveal between the frame and the door is consistent. Start from the top of the door towards the bottom. As you go down, make sure that there are shims above and below the strike plate to reinforce and add strength to that area.
Secure each of the shims with a brad nailer and got off the excess shims.
If you want to make slight adjustments, you can use a wood block and a hammer to tap the jamb or the door stop in the direction you need.
Step 8: Shim the top of the door and make sure the reveal is consistent at the top
Now do the same thing at the header (the top of the door) and insert shims where the gap between the frame and the door is less than level.
Again, secure each of the shims with a brad nailer and got off the excess.

If you want to make slight adjustments, you can use a wood block and a hammer to tap the jamb or the door stop in the direction you need.
Step 9: Test the door
Swing the door to make sure that it swings freely without obstruction. In our case, it swings ¼ inch above the floor so that it prevents backdraft in the case of fire.
Step 10: Install the door casing (door trim)
Now to cover up the shims with the trim.
Decide how far back you want the trim sets back from the jamb. In our case, we are going with a 3/16” reveal. Mark that distance all the way around the jamb to show where the trim will sit.
Measure the corners that you marked. This will be considered the shorter distance of the trim and you will need to make a mitered joint cut at a 45-degree angle of the trim to ensure that the angled cuts will line up at the corners of the door trim.
Install the header piece first and secure with a brad nailer. Once that is secured and in place, use the points at the section of the header trim as a place to determine the measurement of the trim at the sides of the door.
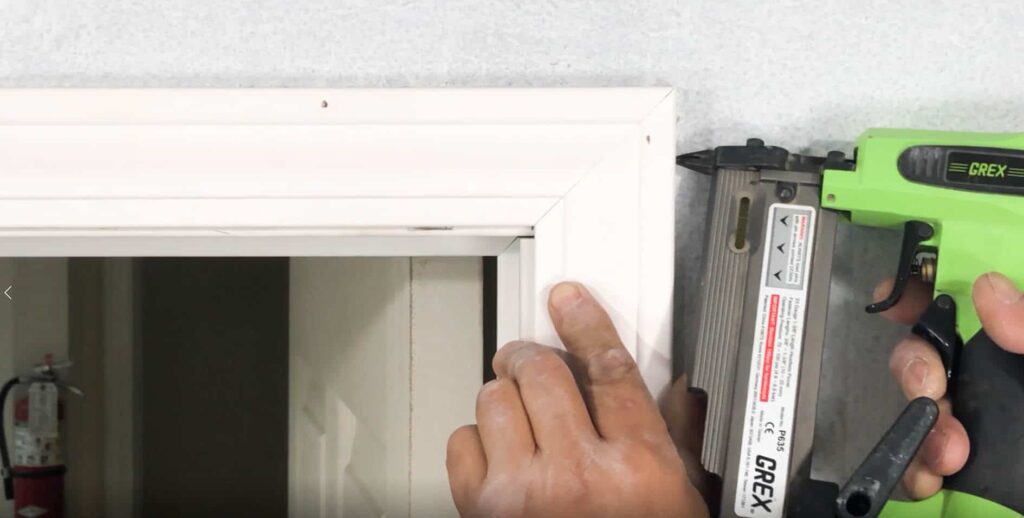
Cut the needed measured trim and install. If needed, do this for both sides (different rooms) of the door and make sure that the reveals between the door jamb and the trim are consistent
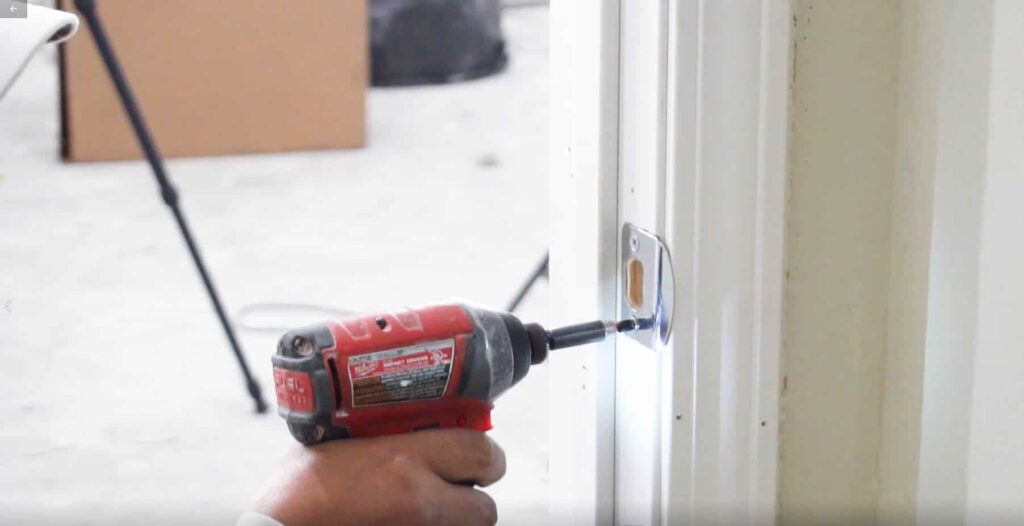
Step 11: Install doorknob and strike plate
This project is now complete!

For more in our Home Modeling Series, check out our videos on our YouTube channel or our other articles here at the Best Online Cabinets blog!


